Roles & Permissions
Manage and assign permissions efficiently with Role-Based Access Control (RBAC).
Tutorial 2: How to Assign Permissions to a Role
Why It Matters
Assigning permissions to roles ensures users only access what they need. This simplifies security and management using Role-Based Access Control (RBAC).
Step-by-Step Guide
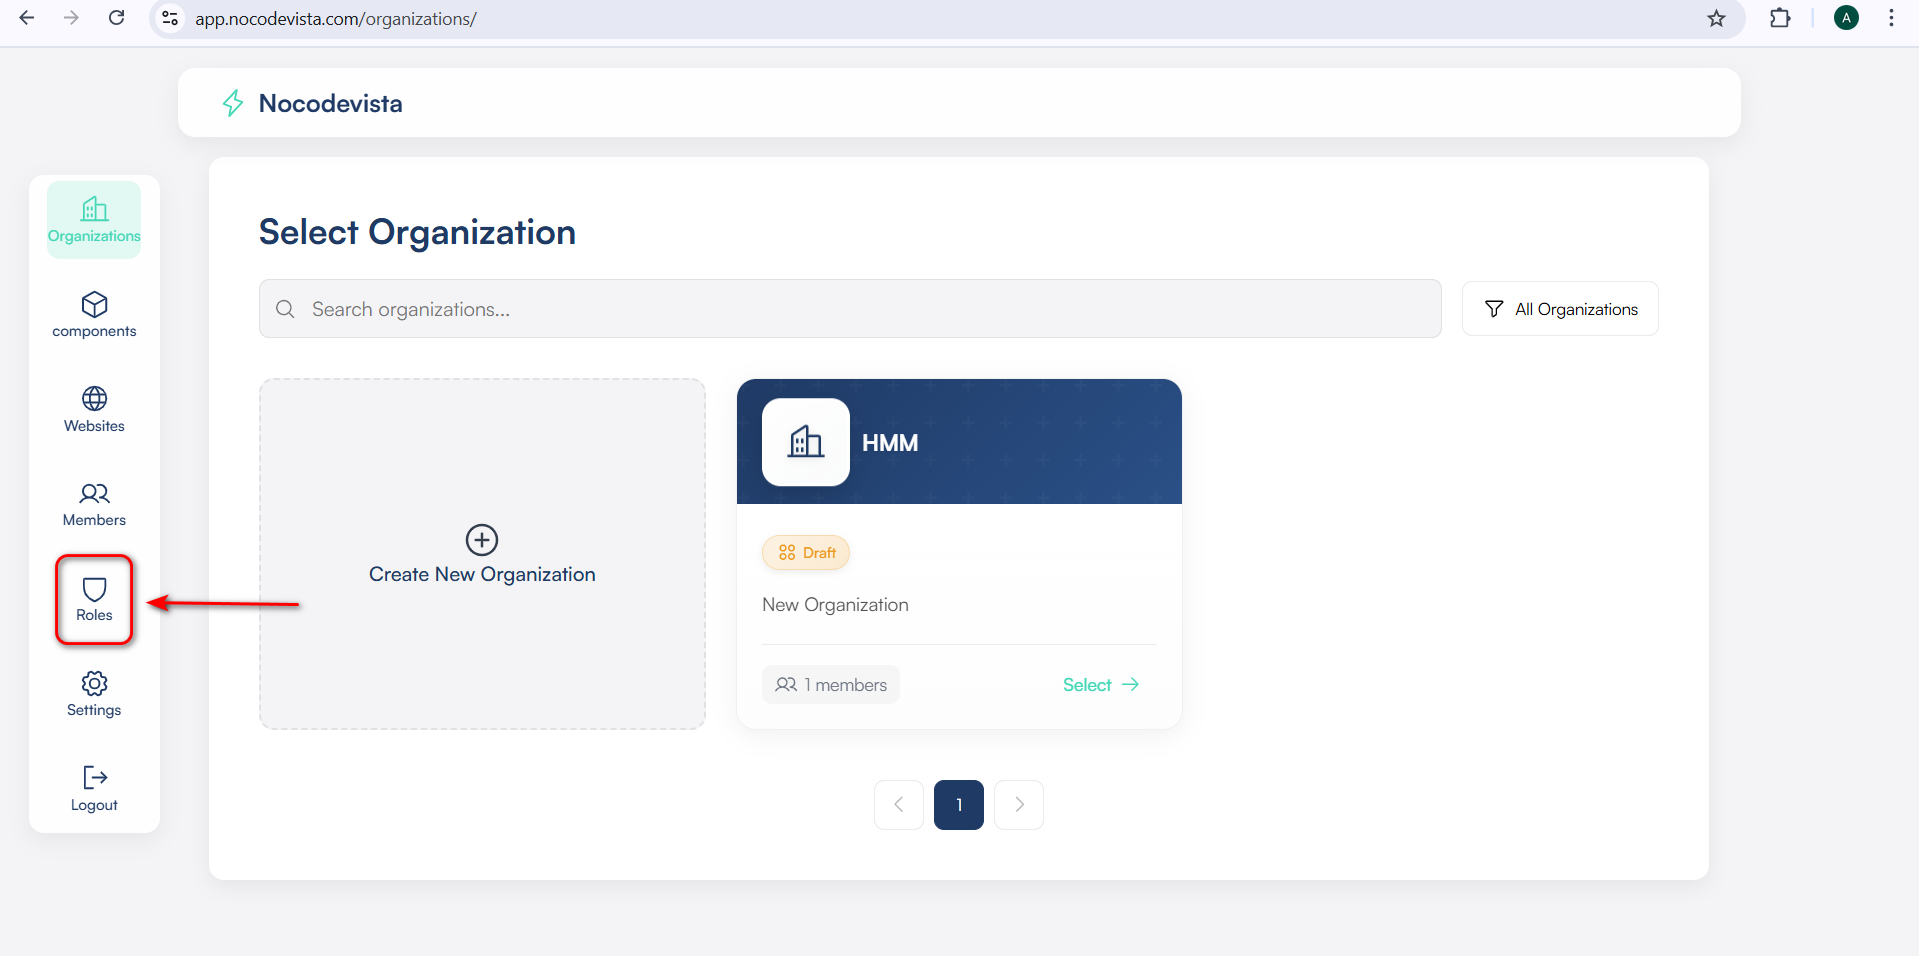
- Step 1: Navigate to Roles
On the left sidebar, click Roles.
You’ll see a list of all existing roles.
To create a new role, click Create Role. - Step 2: View Available Modules
Once inside the role creation screen, you'll see different permission modules, such as:- Components
- Pages
- Websites
- Schemas
- Data Records
- User Profile
- Admin
- System
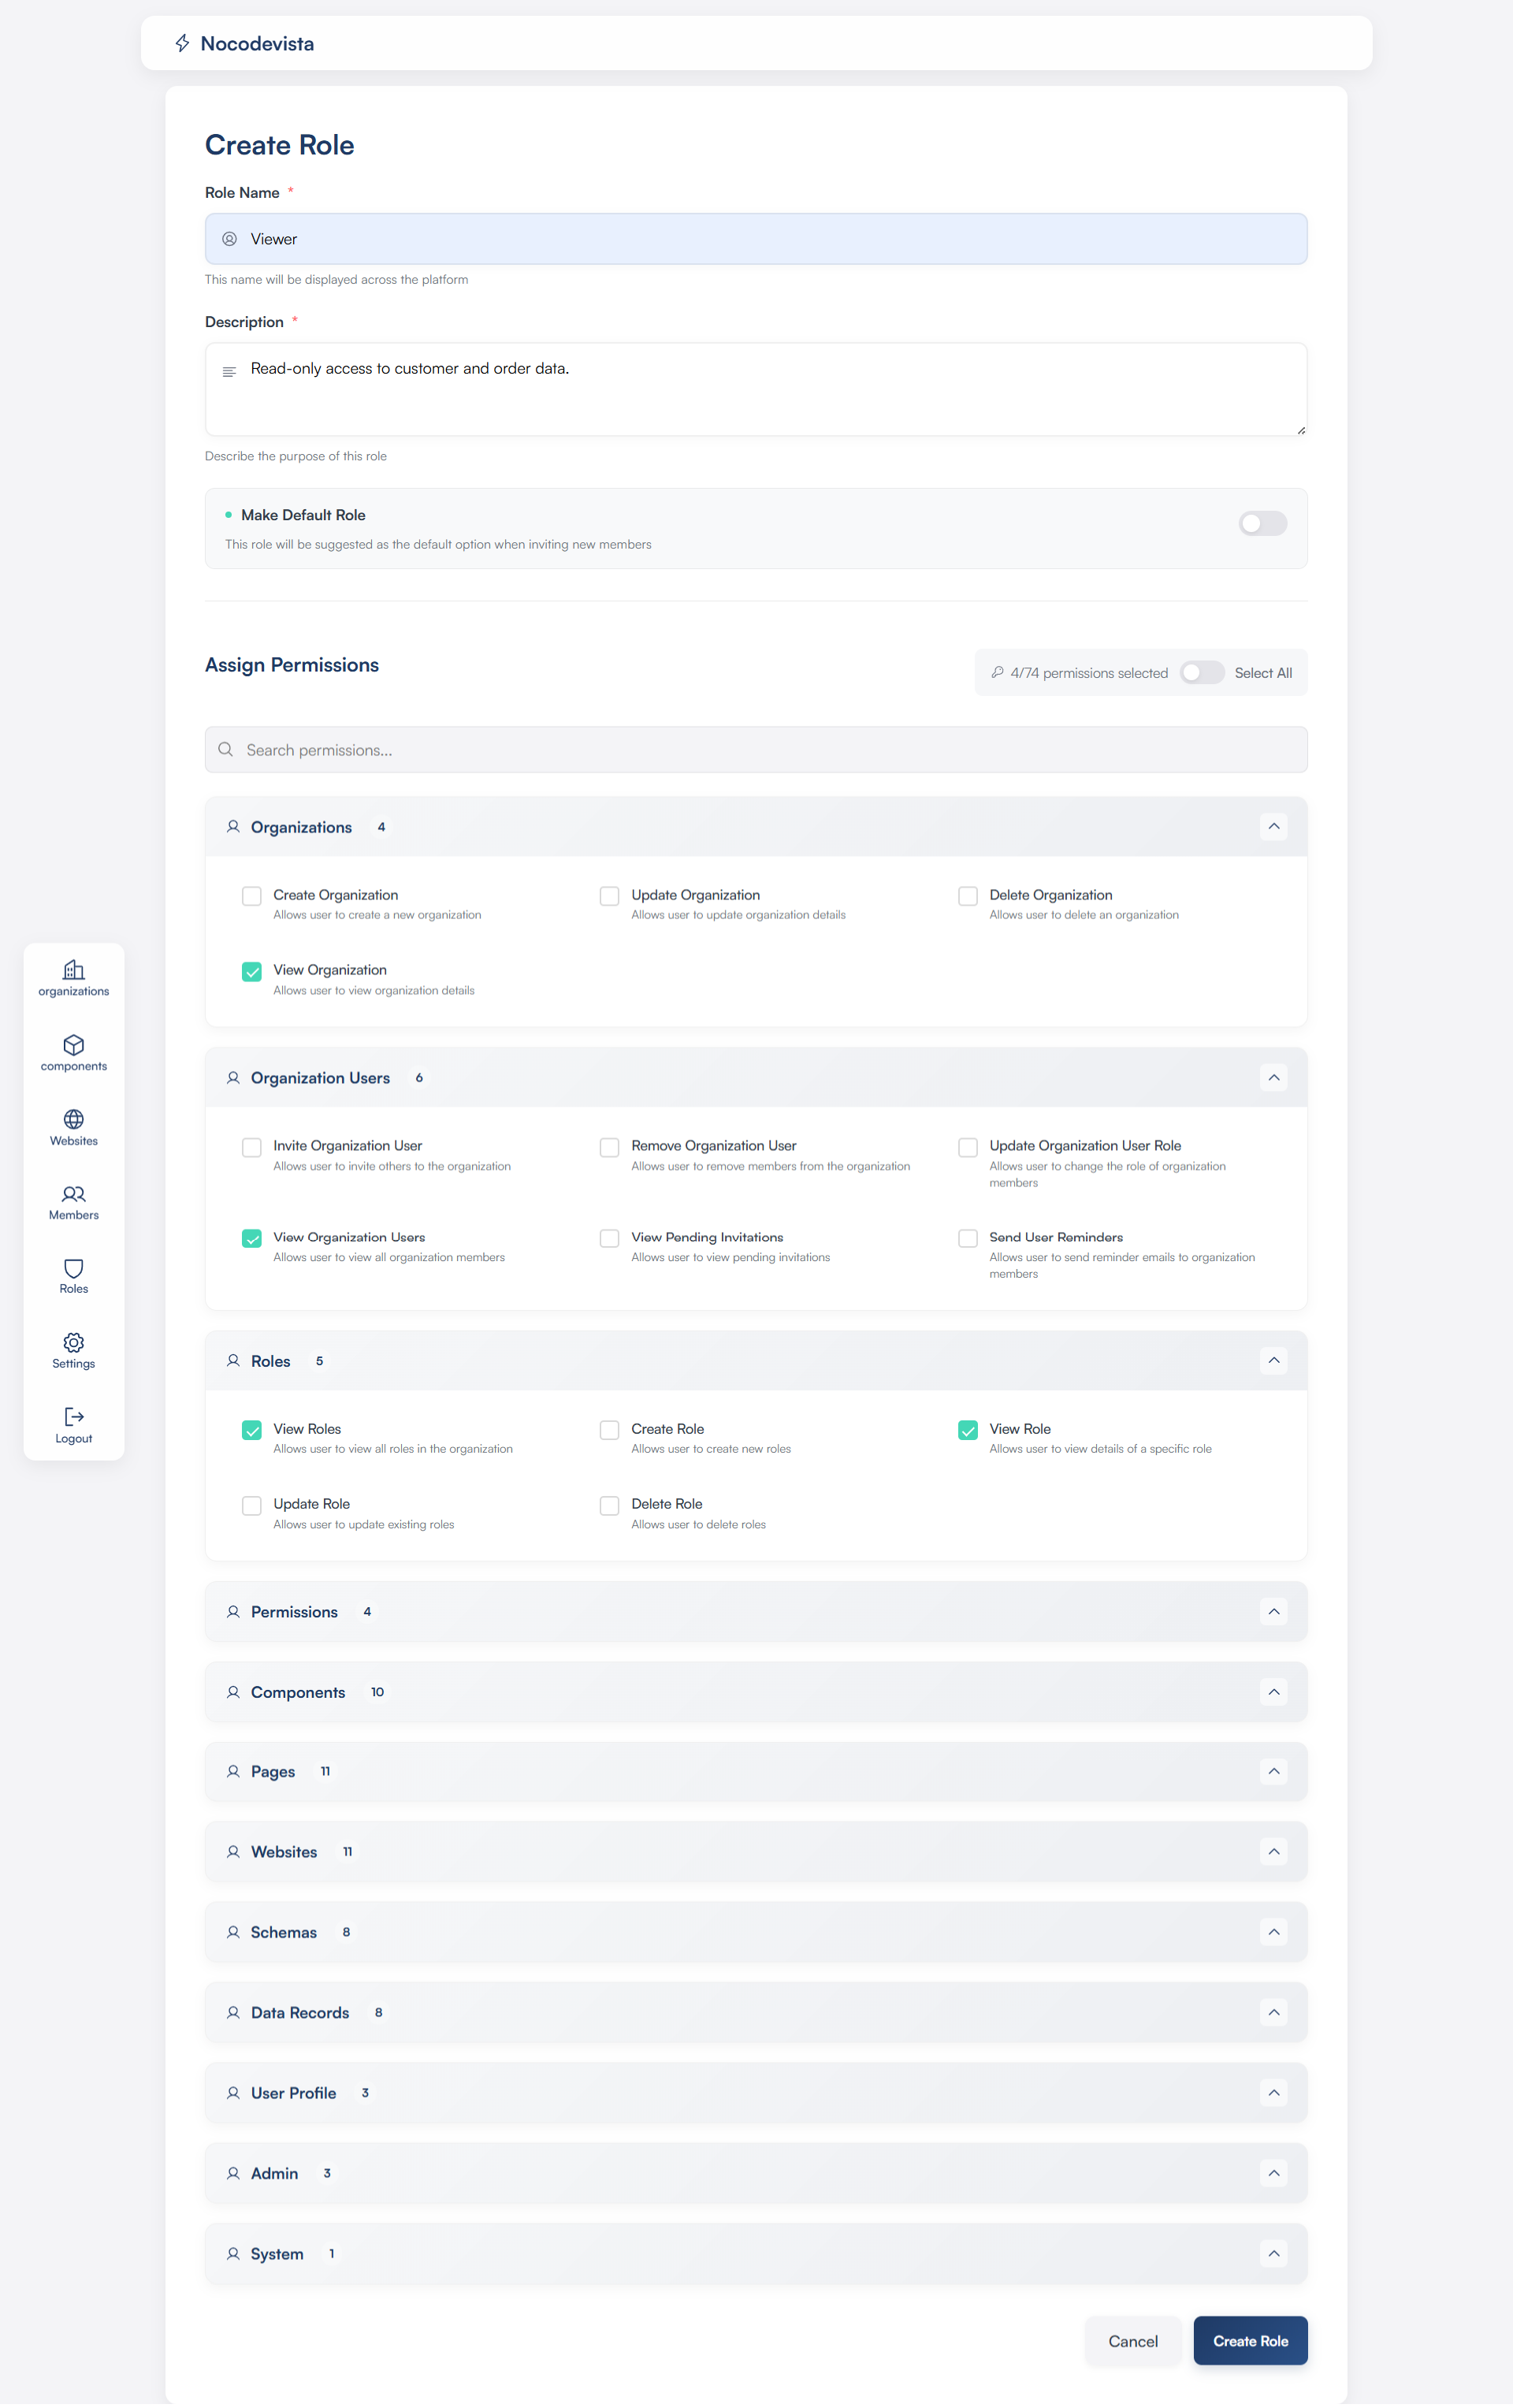
- Step 3: Expand a Module
Click the dropdown arrow beside any module to expand it.
Inside, you’ll find actions that can be enabled or disabled for that role, such as:- Create
- Read/View
- Update/Edit
- Delete
- Manage
- Step 4: Select Permissions
Tick the checkboxes next to the permissions you want to allow under each module.
Example for Data Records:- ✅ View
- ✅ Create
- ❌ Delete
- Step 5: Scroll and Configure All Relevant Modules
Go through each section (Schemas, User Profile, etc.).
Assign only the permissions needed for the role. - Step 6: Click “Create Role”
After assigning permissions, scroll to the bottom.
Click Create Role to save and activate it.
✅ Example Role: Viewer
| Module | Permissions Assigned |
|---|---|
| Organization | ✅ View Organization, ✅ Create, ❌ Delete |
| Roles | ✅ View Roles, ✅ Edit |
| Admin | ❌ None |
💡 Tips
- Start small — begin with limited permissions and add more as needed.
- Group roles by job function (e.g., Sales Manager, Content Editor).
- Use Viewer roles with only “View” permissions for audit or monitoring users.