Organization Members Management
Learn how to invite, assign roles, and manage members effectively within your organization using Role-Based Access Control (RBAC).
Tutorial 3: How to Manage Members in Your Organization
Why It Matters
Inviting members with specific roles helps you collaborate effectively while keeping control over what each team member can access and modify. You can assign roles like Owner, Admin, or Viewer at the time of invitation.
Step-by-Step Guide
-
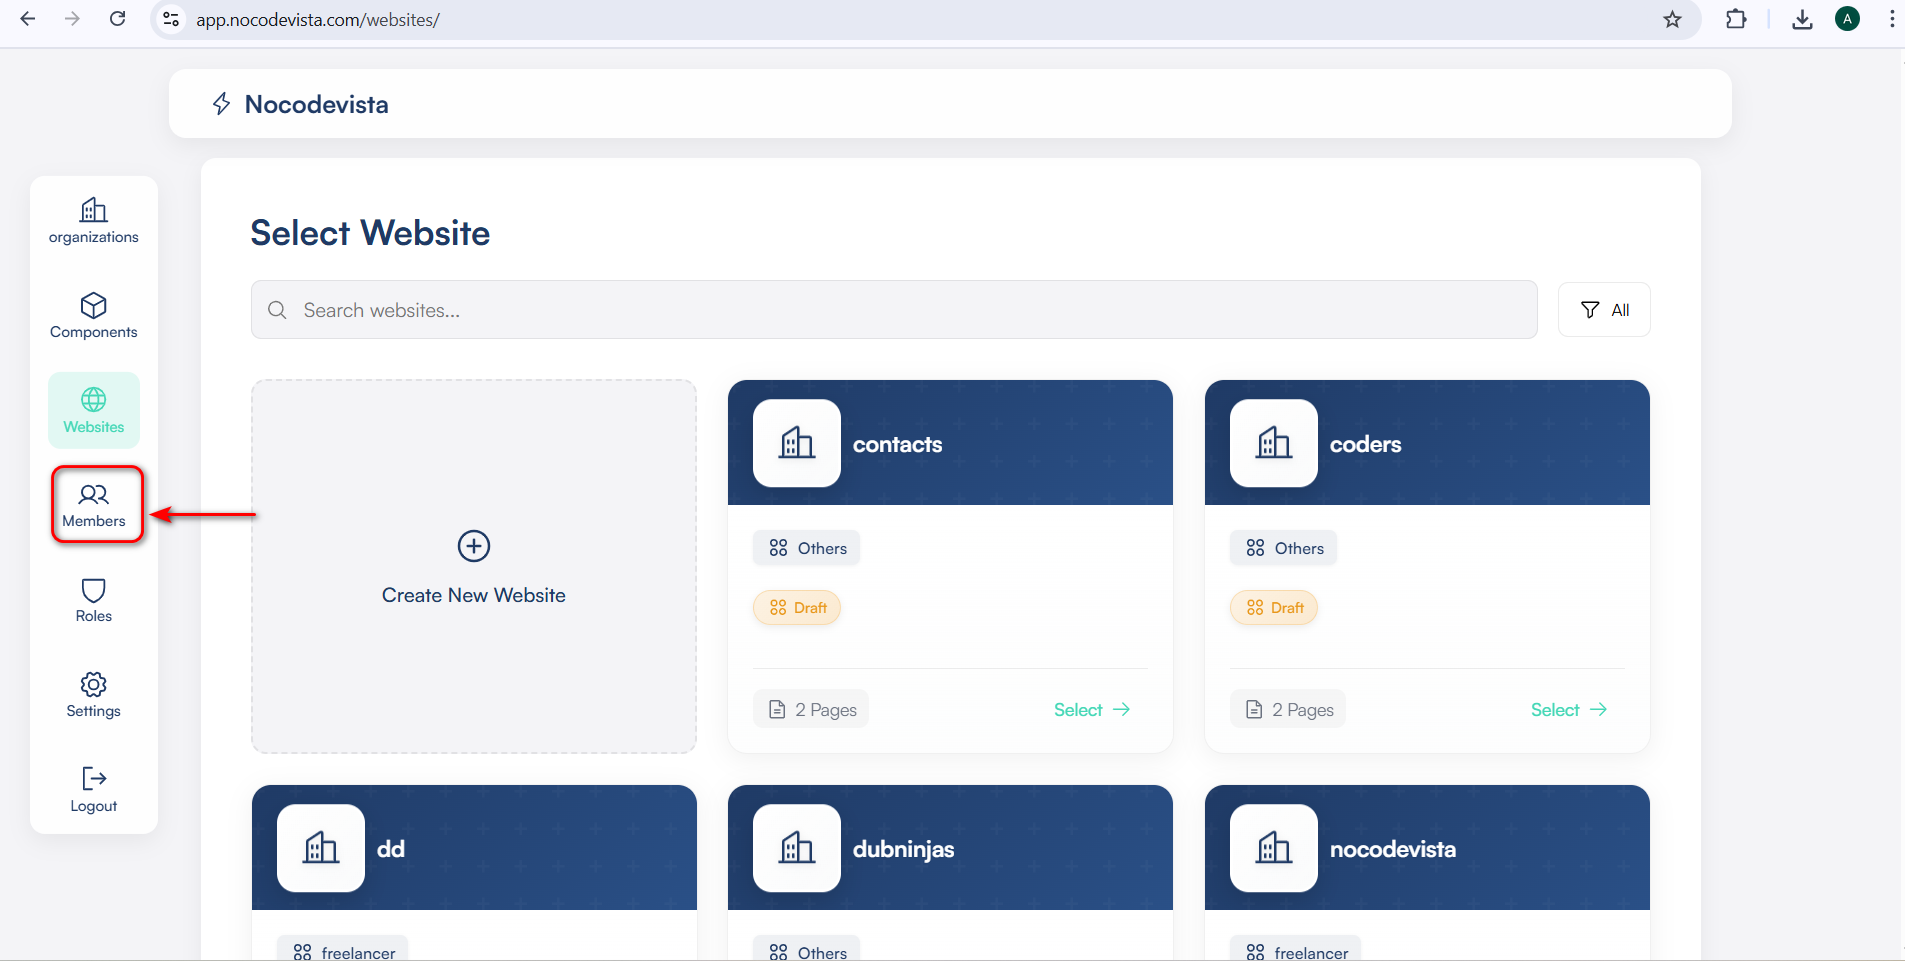
Step 1: Go to the “Members” Section
From the left-hand menu, click Members.
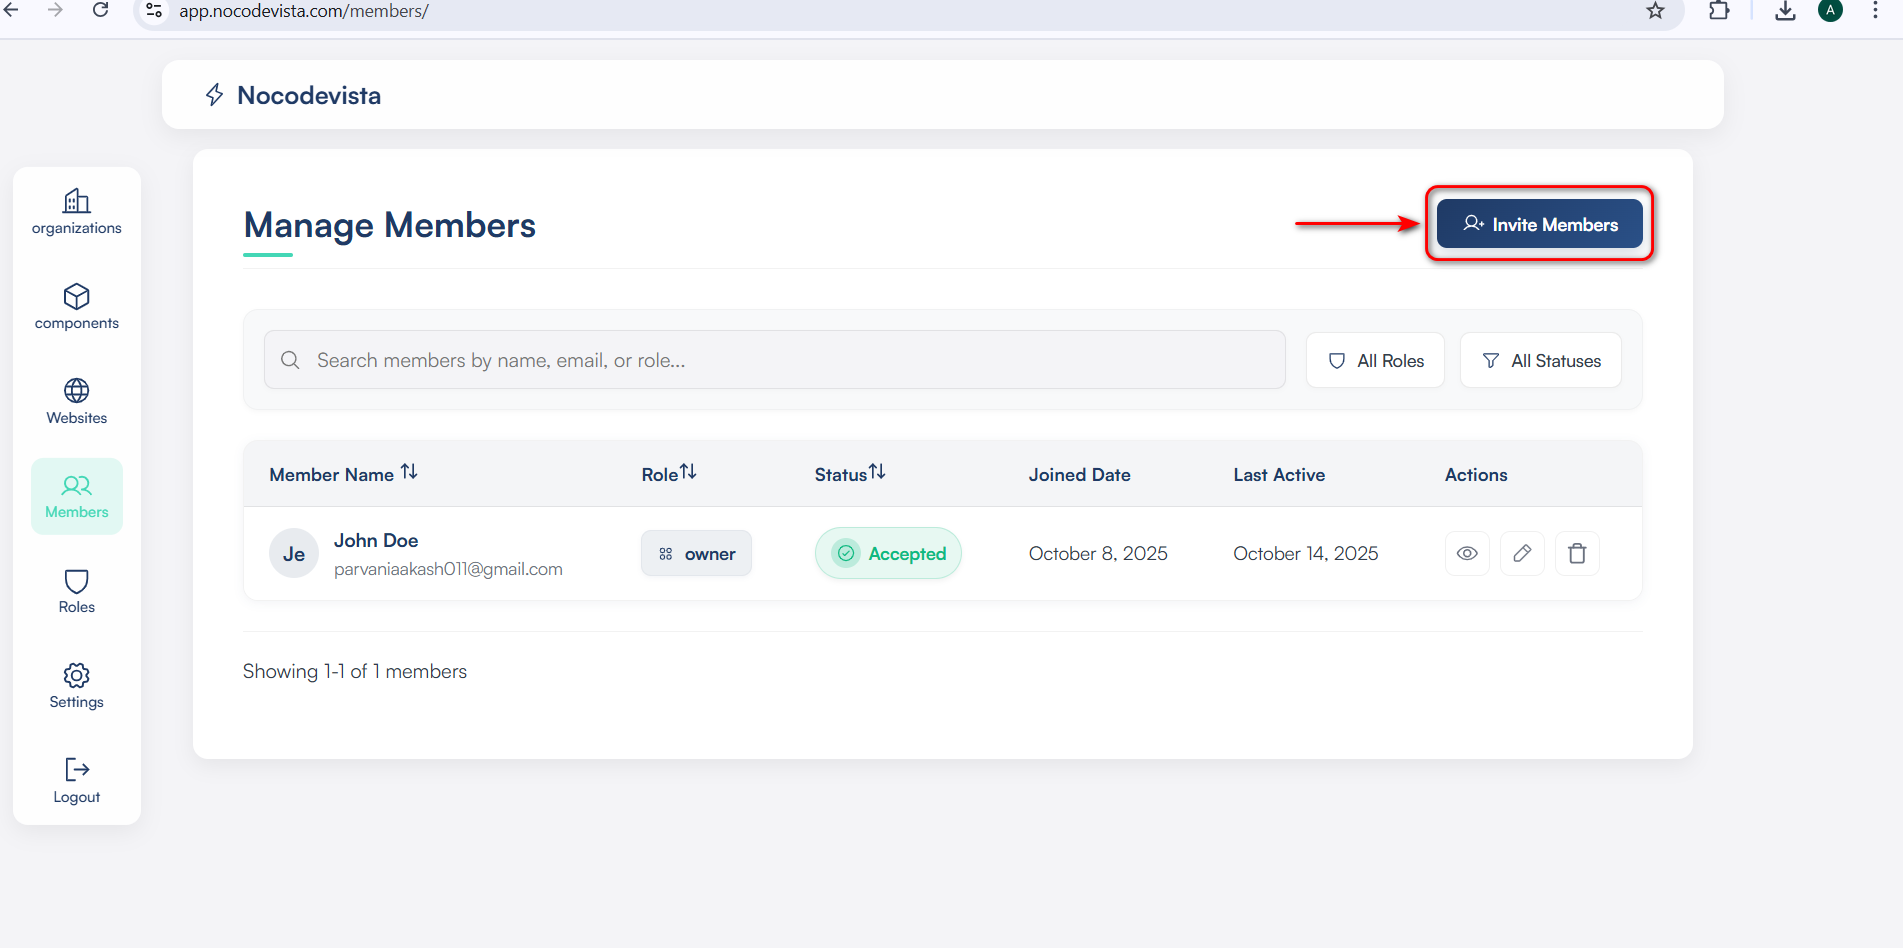
This opens the Manage Members screen where you can see all current users and their roles.
-
Step 2: Click on “Invite Members”
On the top right, click the blue Invite Members button. -
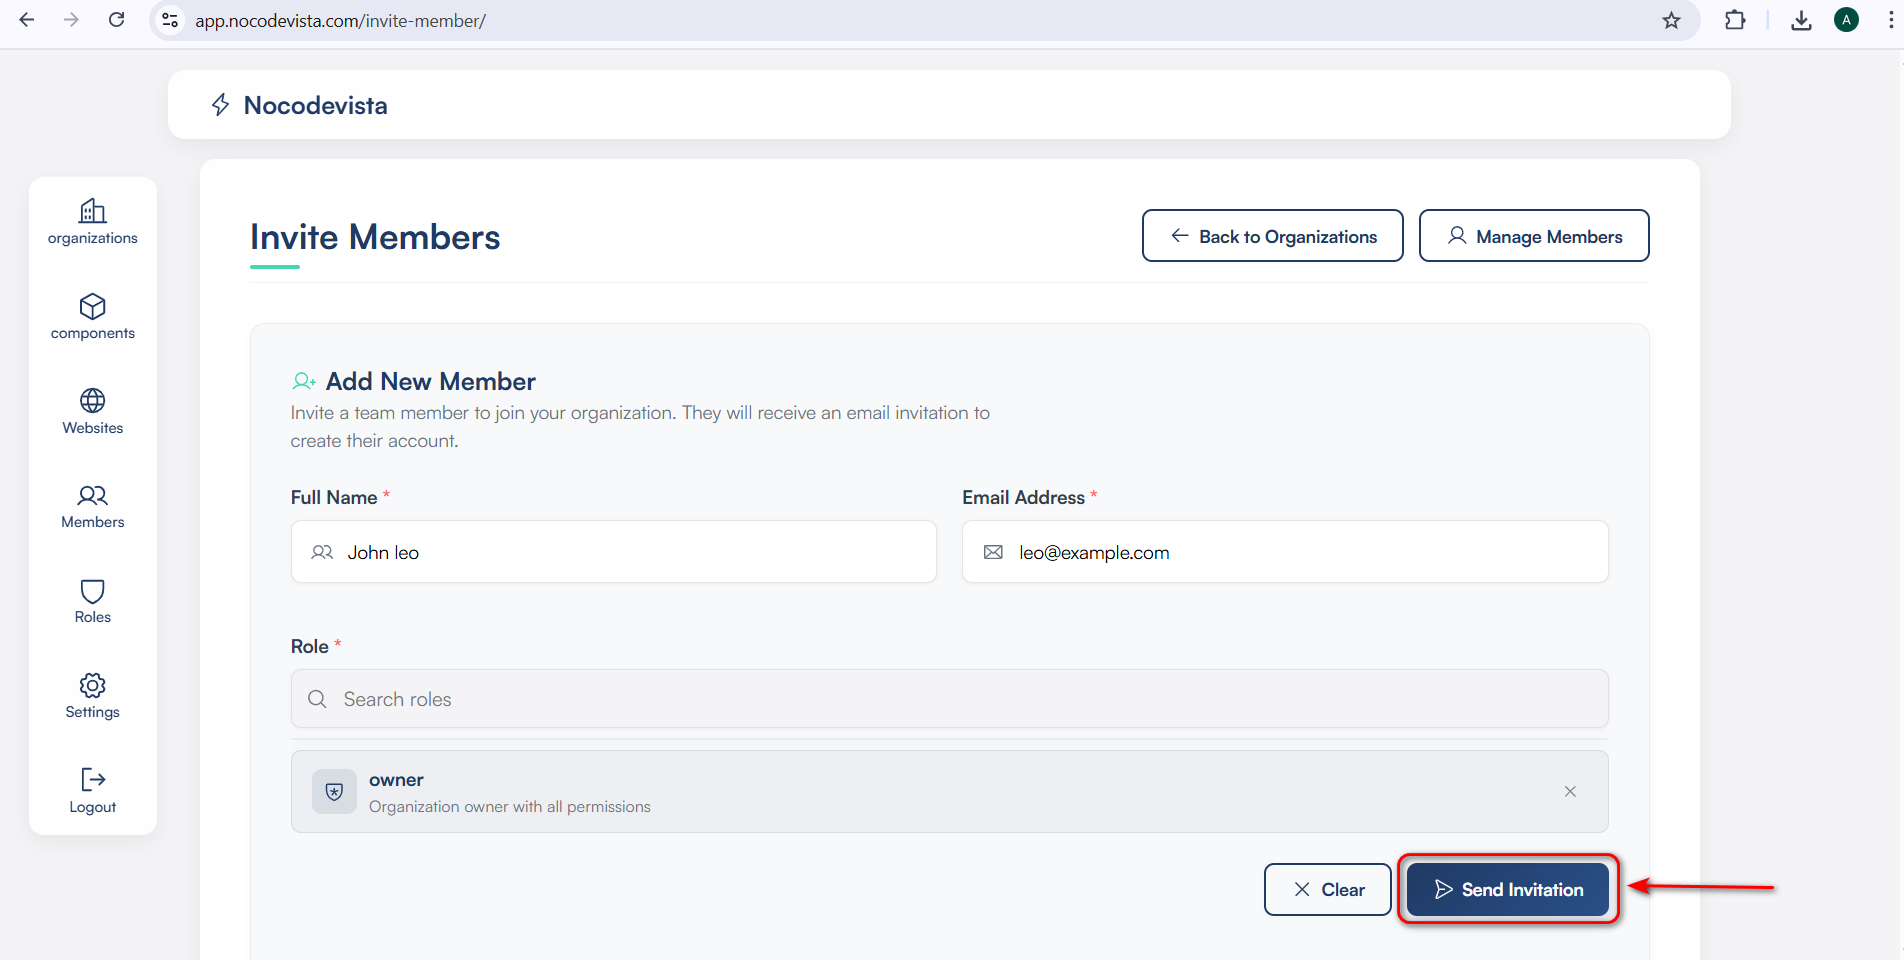
Step 3: Fill in Member Details
You’ll be taken to the Add New Member screen.
- Full Name: Enter the name of the person you want to invite (e.g., John Leo).
- Email Address: Enter their email (e.g., [email protected]).
- Role: Choose a role from the list (e.g., Owner, Manager, Viewer). This determines the permissions they will have.
-
Step 4: Click “Send Invitation”
Once all fields are filled, click the Send Invitation button at the bottom.
The invitee will receive an email with a link to join the organization. -
Step 5: Monitor Pending Invitations
Below the form, you'll see a section titled Pending Invitations.
From here, you can:- View sent invitations.
- Cancel invitations if needed (before they are accepted).

💡 Tips
- Only invite people you trust, especially for roles like Owner or Admin.
- Use Viewer roles for auditing or stakeholder visibility.
- You can always edit or change a member's role later from the Members tab.
RBAC makes it easier to scale and maintain secure access control within your organization.