🌐 Website Settings – Step-by-Step Guide
This guide will help you manage your website’s domain and control its visibility through the settings page.
🔧 Step 1: Navigate to Website Settings
From your dashboard, look at the left sidebar.
Click on the Settings menu (⚙️ icon).
You will be taken to the Website Settings page.
🌍 Step 2: Set Your Website Subdomain
Under Domain Settings, you’ll see a field to set your subdomain.
Enter a custom subdomain (e.g., yourbrand) in the input box next to https://.
Your website will be accessible at: https://yourbrand.nocodevista.com
Make sure your subdomain is unique and represents your brand or project.
Click Save Changes (top-right button) to apply.
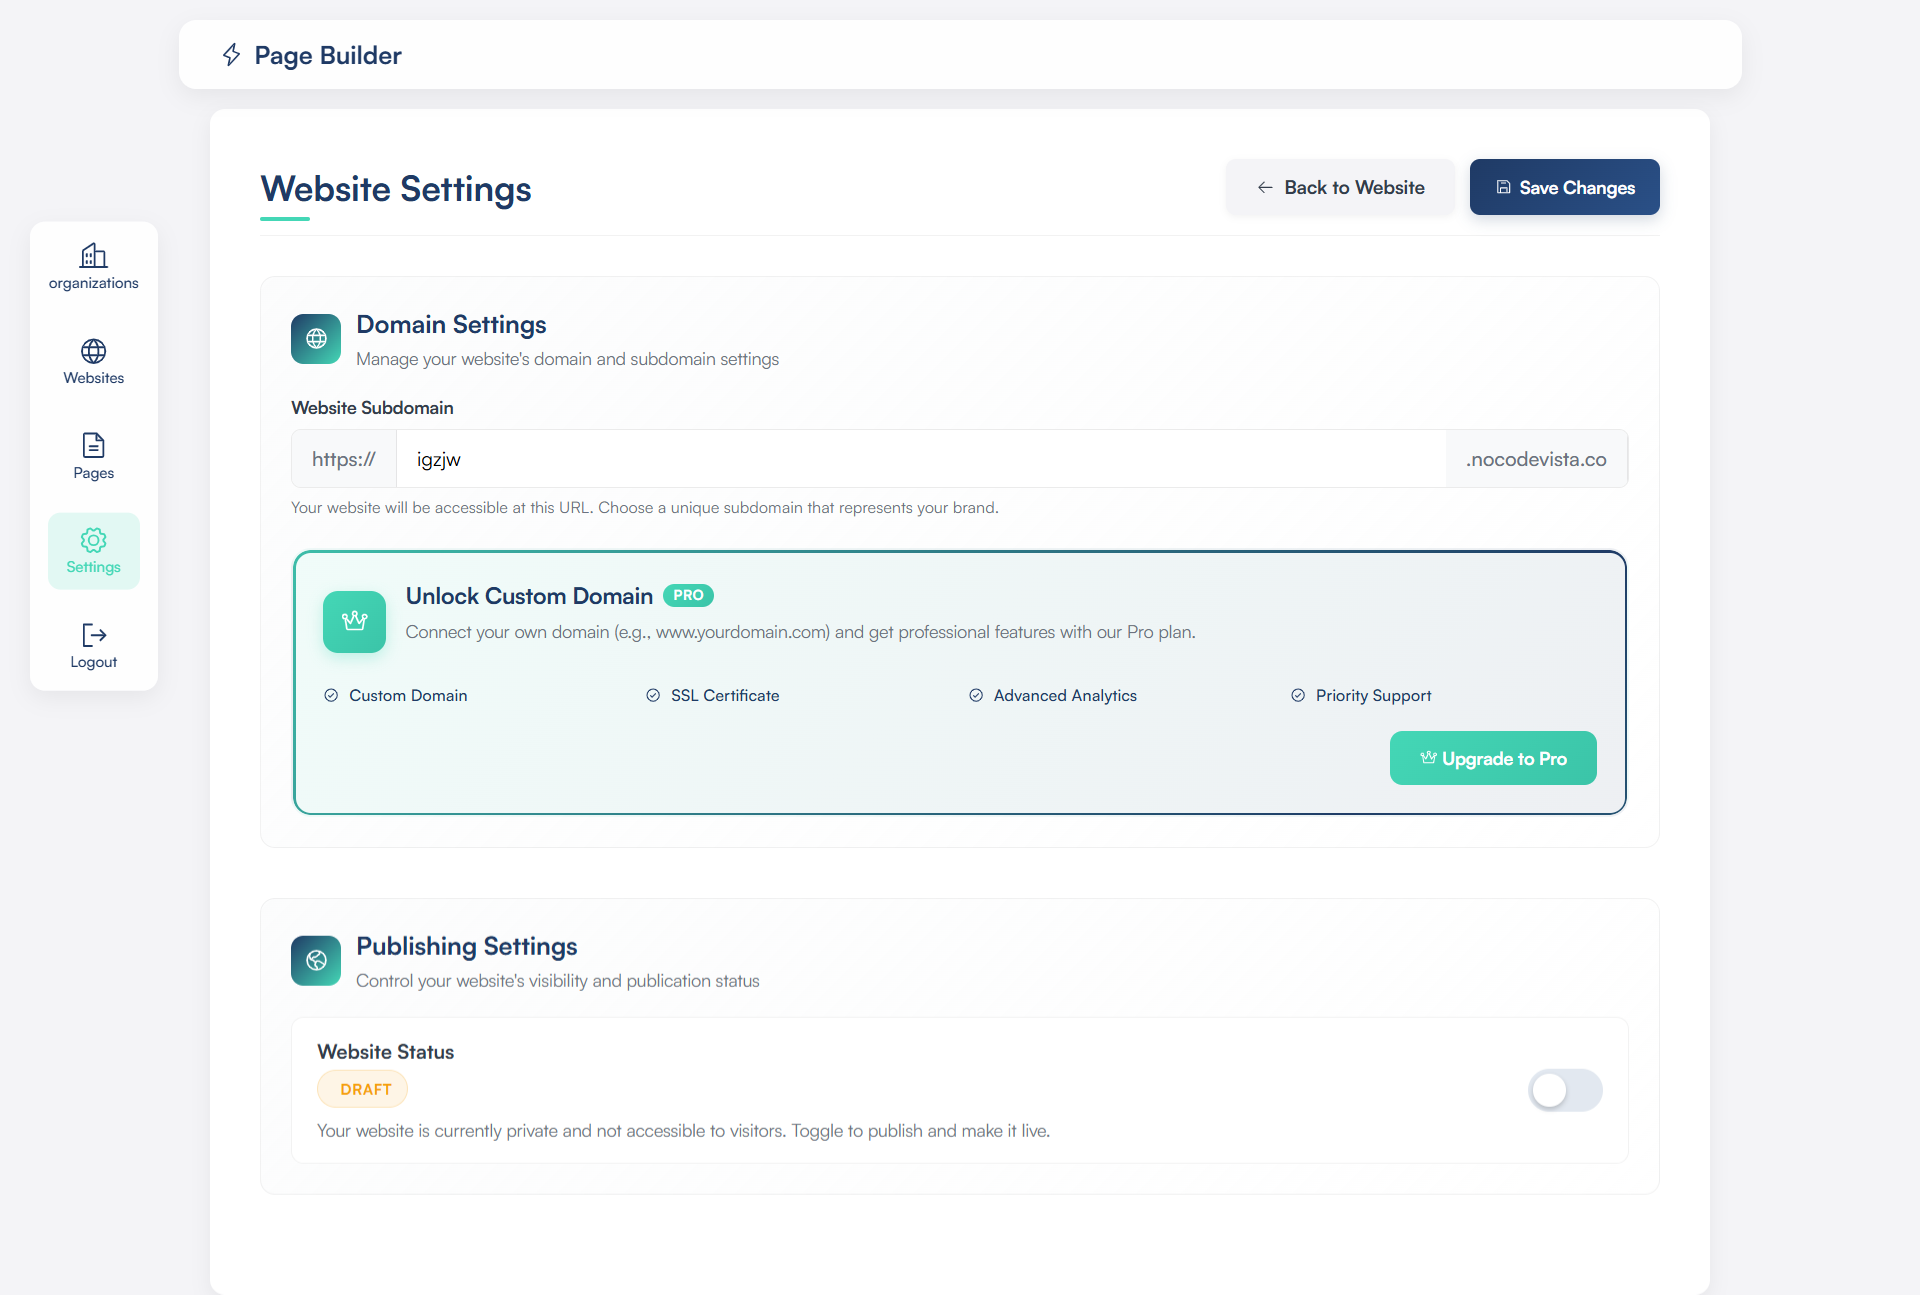
🔓 Step 3: Upgrade for Custom Domain (Optional)
If you want to connect your own domain (e.g., www.yourdomain.com), you’ll need to:
Click the Upgrade to Pro button in the “Unlock Custom Domain” section.
This will give you access to:
- Custom Domain
- SSL Certificate
- Advanced Analytics
- Priority Support

📢 Step 4: Change Website Visibility (Publish or Unpublish)
Scroll down to Publishing Settings.
You’ll see a toggle switch under Website Status.
DRAFT – Website is private and not visible to visitors.
PUBLISHED – Website is live and can be accessed by anyone with the link.
Toggle the switch to publish or unpublish the website as needed.
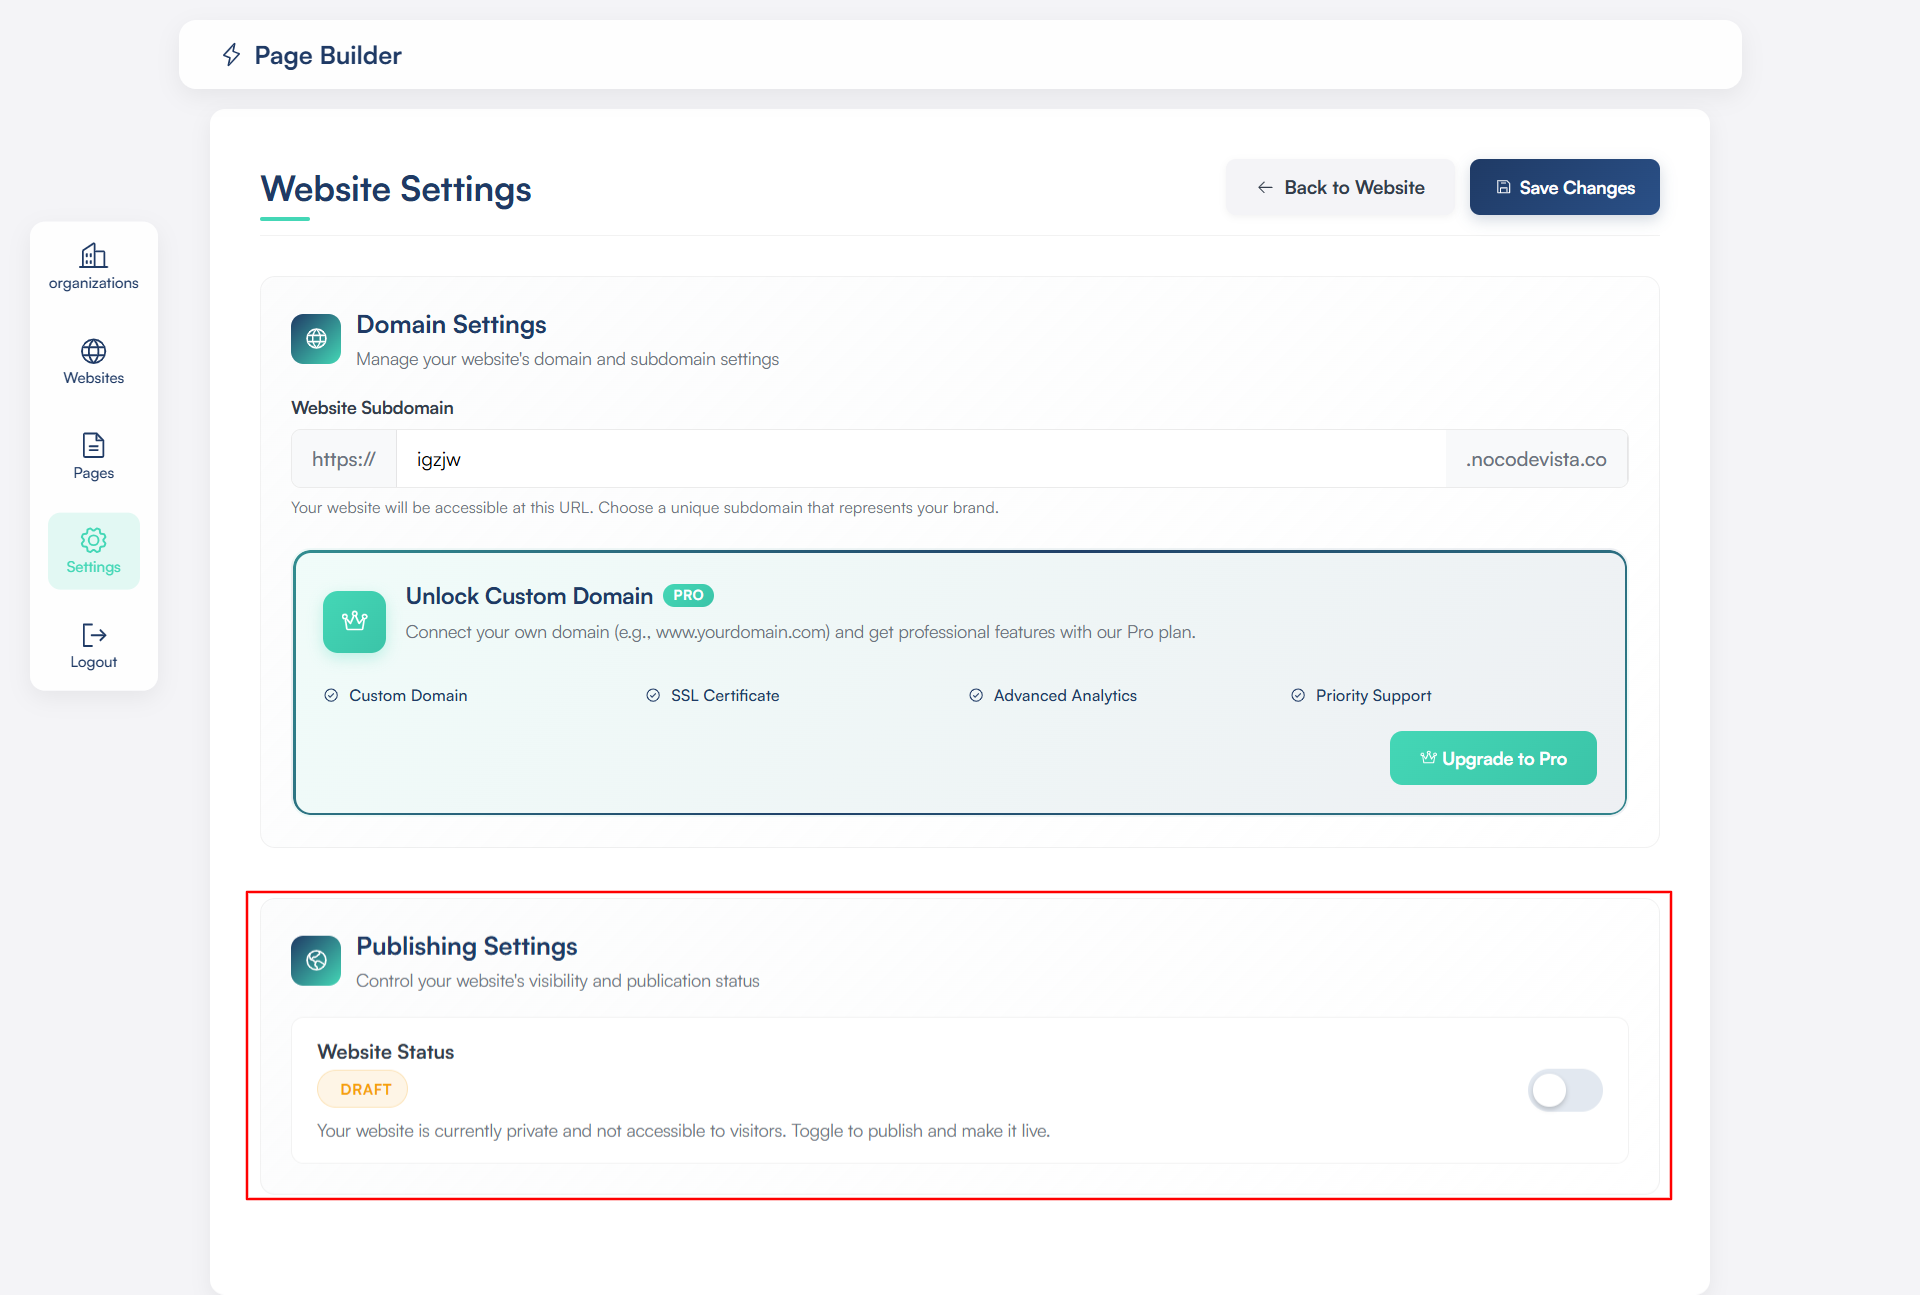
✅ Final Step: Save Your Changes
After setting your subdomain and publication status, don’t forget to click the Save Changes button at the top.
Changes will take effect immediately once saved.